Measuring
- With the dinghy placed upside down on a table, fit the collar on the dinghy hard against the chine. (The join between the bottom and the sides: fig 1 & 2).
We set ours about 20mm in from the transom. You should have a substantial amount of collar hanging over at the bow. (DONT CUT IT OFF – you will need it to form your bow shape).


- Mark the position of the collar on the dinghy sides (Fig 3)
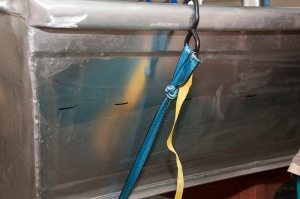
Fig 3

- If there is a step, or steps, (clicker style) on the side of your tinnie, then you will need to remove the equivalent amount of plastic from the collar with an electric planer. (Fig 4)
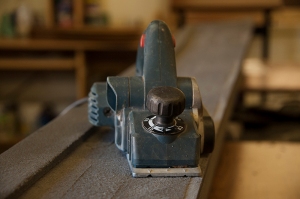
Fig 4

- Measure that step position relative to the chine, and transfer that position onto the collar. (Our Stacer Stinga 309 had only one step, and accordingly, we removed that material from the collar)
- Now measure the step’s protrusion from the side of the dinghy. This is how much material you need to remove from the collar (fig 4).
Double check, because it’s easy to remove material from the wrong end of the collar. You must work out which is the top and which is the bottom. (The bottom goes against the chine!)
One way is to tie the collar to the dinghy, and from the transom looking forward, mark the outline of the material that has to be removed.
You can use ratchet tie downs to hold the collars on to the boat. Only 3 or 4 are required for sizing and initial fitting but when you are actually gluing more is better. 8 were required to hold the collar in place during the gluing process on our 3.1m dinghy.
- Our chine (bottom of fig 3) had a solid fillet weld which stops the corner of the collar from fitting hard against the inner edge of the chine, so we planed the corner off the collar until she was a snug fit (fig 5).
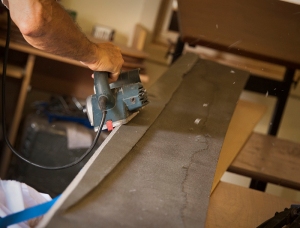
Fig 5

Fitting
- Once you have finished machining the collar and confirm that it fits snugly, you are ready to prepare both the tinnie and the collars for gluing.
- Since the collar is still attached to the dinghy you may as well apply masking tape so that oozing glue won’t mark the collars, or the dinghy. You will need to mask the dinghy and the collar all around as the glue will ooze out! (Fig 6)
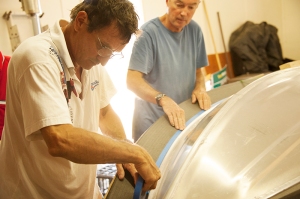
Fig 6

- If you have some thin plywood sheeting, make a shield for the collar. This will assist spreading the clamping pressure across the length of the collar (Fig 7).
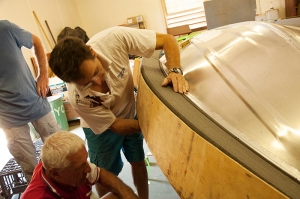
Fig 7

Acid Wash
Now its time to prepare the dinghy. The next steps involve the use of dangerous chemicals. Follow all instructions on the product and protect your self with suitable glasses, gloves etc.
- Start by tipping the dinghy upside down: preferably on an old table and outdoors!
- Apply the acid wash onto the aluminium surface (fig 8).
- Leave it on for about 20 min so it can remove the oxide layer.
- Wash off with clean water
- Immediately dry the surface with a clean rag
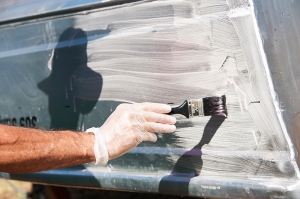
Fig 8 - Now immediately apply corrosion protection (next step).
- DON’T dally or the oxide will form again.

Corrosion Protection
This step requires the use of a chemical coating to protect the aluminium from corrosion (Fig 9).
This stuff is highly toxic. Don’t touch it or breathe it and FOLLOW ALL safety instructions.

- The chemical is exceptionally runny so it will go everywhere unless you are very careful
- We applied it to the entire side of the dingy (fig 10), not just the glue area. (I did this because I also wanted to paint the dingy sides and transom in bright yellow: a good safety colour, and it makes finding your dingy a lot easier!)

Fig 10

- Once the chemical is applied, just leave to dry: it does not take long.
NOTE: If you are not keen on this ‘chemical’ method, you can replace the chemicals by using a wet sand with epoxy. The bond is not as strong, but it should be adequate.
You can now proceed with the preparation of the foam collars.
Flaming the Foam
Polyethylene requires some preparation to facilitate the gluing process.
- With the propane gas torch (fig 11), do a quick pass over all the plastic surface which is to be glued. This is not intended to burn the plastic, so don’t stop moving the flame as you pass it over the plastic.
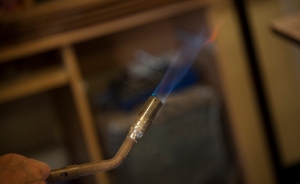
Fig 11

- Keep the flame approximately 300mm (fig 12) away from the surface and move quickly.
You should see the foam change colour just slightly.

Once you have flamed the surface, you are ready to do a final acetone clean of both the collar and the dinghy. Do this just before applying the epoxy glue.
NOTE: Gluing requires good preparation and CLEAN surfaces!!
Gluing
- Wipe all surfaces down with alcohol or acetone. You are ready to glue.
DO NOT touch the surfaces: WEAR GLOVES
- Mix about 1litre per side (for a 3m dinghy) and apply to both surfaces (fig 13). You should have about 30% left over and this is mixed with the filler to thicken the glue to peanut butter consistency.
(Complete one side at a time)

- As you can see in the photos you can either brush or trowel on the epoxy (fig 14 & 15).
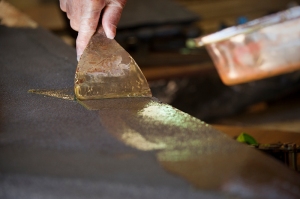
fig 14 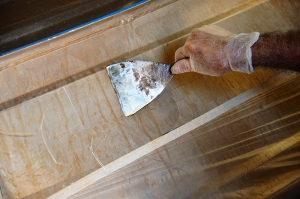
fig 15 - Apply the thickened epoxy filler mix to the dinghy chine(fig 16 & 17).
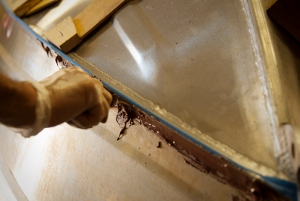
Fig 16 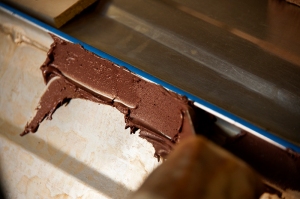
Fig 17


- Once the glue is applied it’s time to bring the foam and the side of the boat together.
I. Apply lots of ratchet tie downs. 3 pairs of hands are about right.
II. Starting at the transom push the foam firmly into the chine. Apply tie downs as you go.
III. Once it’s all tied down check around the bow to make sure that there are no voids or gaps: you will probably also need
thickened epoxy around the bow area.
(This is where you could also use a large vacuum pump and bag if you have it.)
With tie downs, the foam may sit off the surface – especially at the turn of the bow. If it does, use an internal brace to push the
side outwards until the epoxy is set).
- As you can see, the thickened Epoxy should ooze out at the edges. Wipe up all excess! Then when you are satisfied that there are no gaps at the edges of the glue area remove the tape and now leave it all alone overnight (fig 18 & 19). Then do the other side.
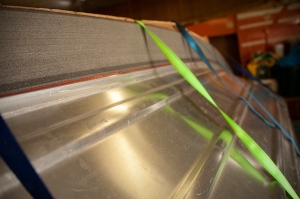
fig 18 
fig 19


- This brings us to the tricky part: the bow.
I. Decide what shape you want to create. We did a bull nose, but many shapes are possible.
II. A standard hand saw will cut the foam easily (fig 20).

III. Make sure you use the hard outer black skin as a final cover over the join.
IV. You will need to use thickened epoxy to fill voids.
V. Make sure that first, you apply pure non thickened epoxy to the foam, then apply a slightly dry & thick mix (fig 21) to all
surfaces to be bonded.

VI. Clamp the two collars together to form the bow (we used tie downs and wooden blocks to hold the shape until the glue set
(fig 22).

Well that’s about it. Once it’s all dry, you can sail/motor away in your remarkable new dinghy. It’s a dry, stable and unsinkable tinnie with solid floaties.


For more detailed instructions and a list of equipment/materials required you can download our pdf at a cost of $2.50AUD.